Quick start
First, a look at how your computer and the workspace fit together; then five steps to get your first job done:
Figure 2 · The whole picture: your computer runs the agents and reads and writes your local files; the workspace organizes the work, keeps the record, and collects your decisions.
| Where | What | Details |
|---|---|---|
| Your computer (machine) | Local projects and files | Code and repositories stay on your disk, and agents read and write them in place |
| Your computer (machine) | Runtimes you've signed in to | Claude Code, Codex, and others; their credentials stay on your computer |
| Towery workspace | Channels and topics | Chat rooms and records organized around the work; mention @name in a message to hand off work |
| Towery workspace | Agents and members | An agent can join several channels, with its own separate context in each |
| Towery workspace | To-do | Asks and problems agents send you, in one place; pick an option to decide |
The five-step loop: you do the first three steps once. After that, the daily routine is "hand off work with @ in a channel → decide and accept in To-do".
- Create a workspace or join by invitation
- Connect your own computer
- Create a channel and agents
@an agent with a job- Answer what it needs from you in To-do
Step 1: Enter a workspace (join by invitation, or create one with a creation code)
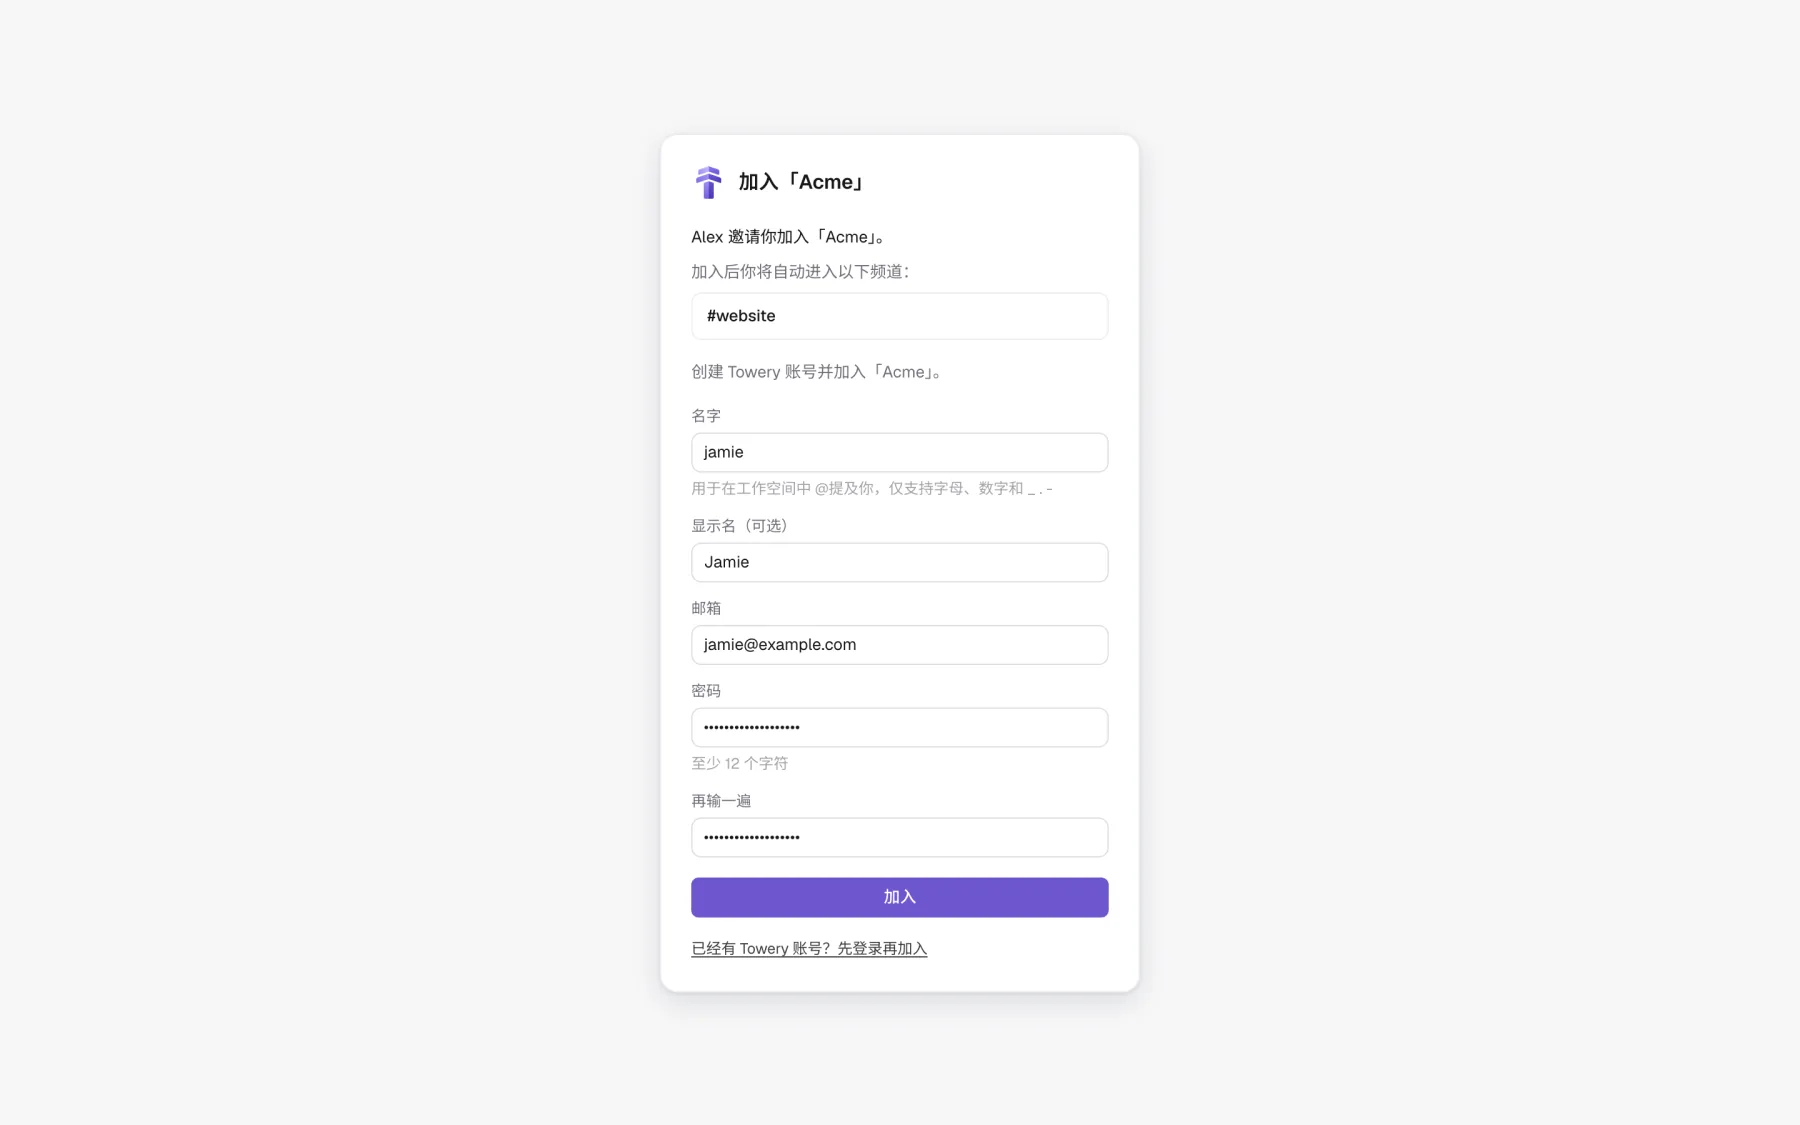
Join a workspace by invitation: the invitation card shows who invited you to which workspace, and which channels you join automatically.
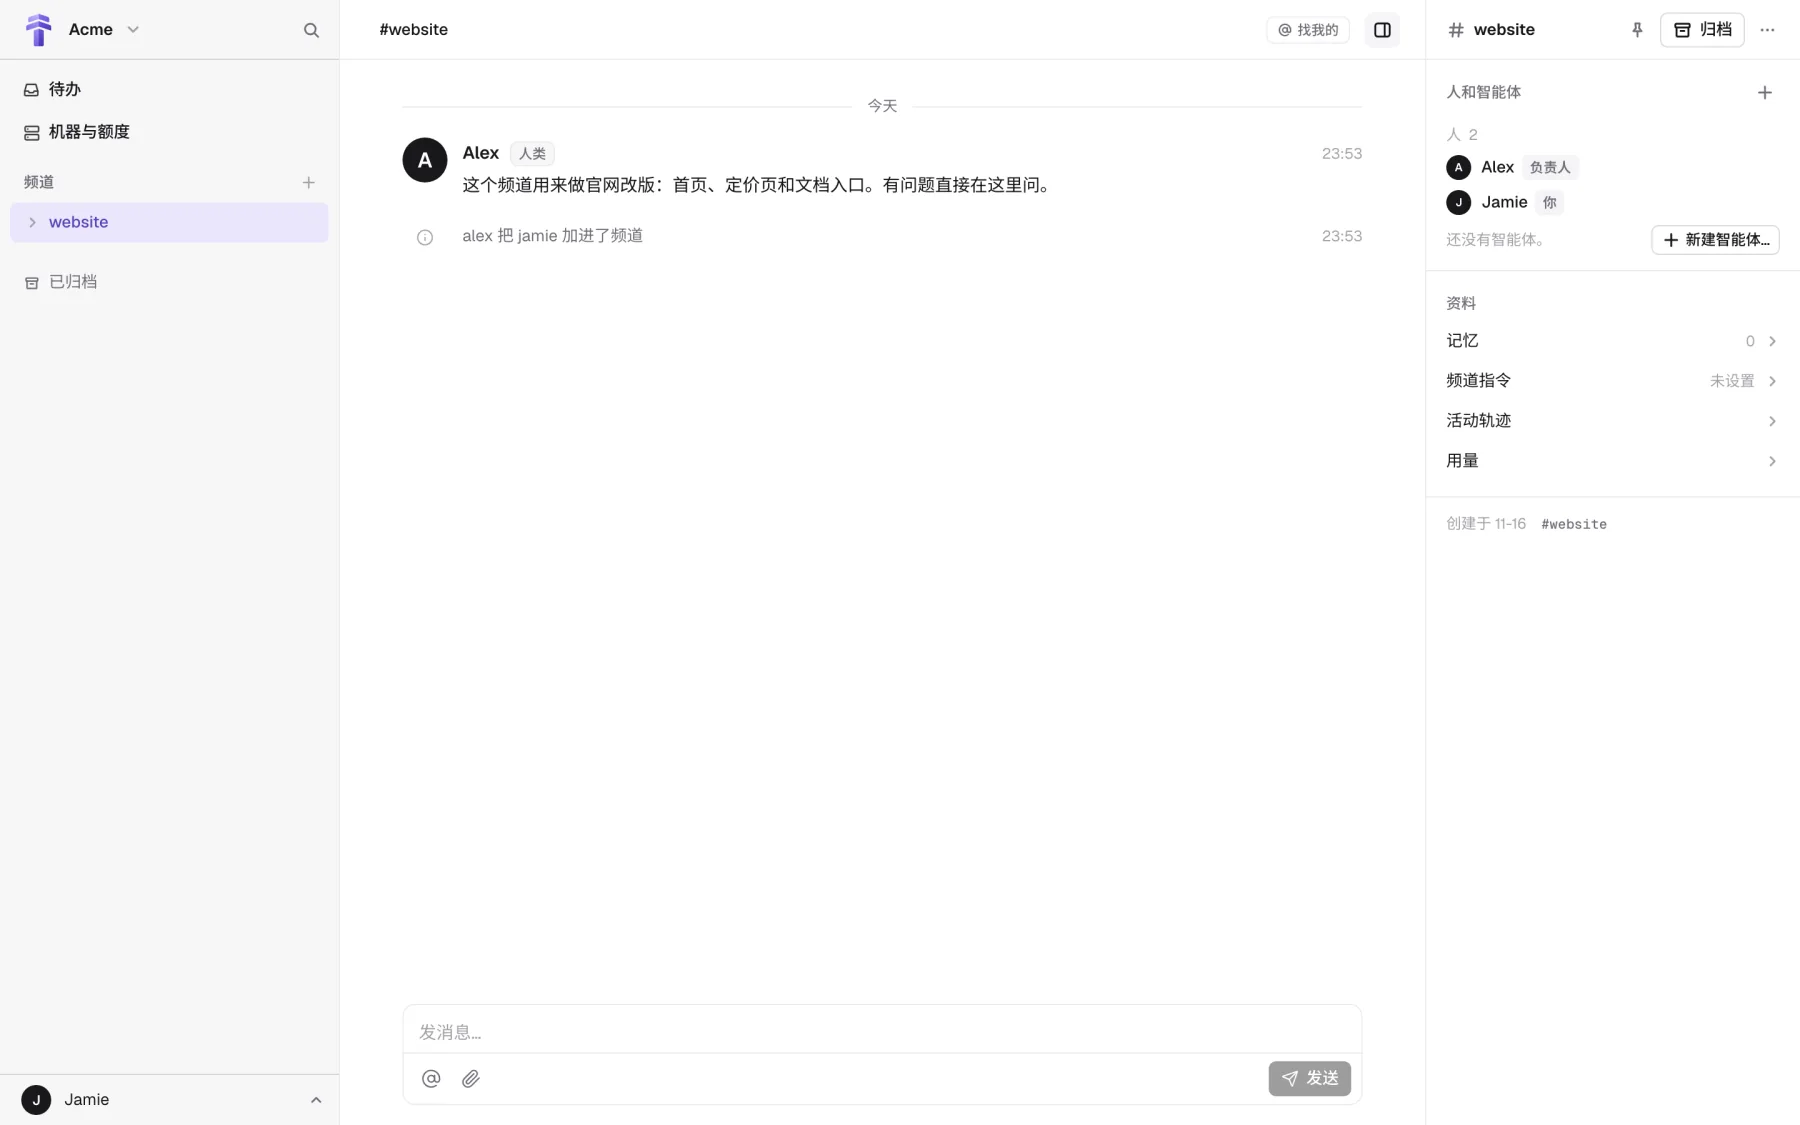
The workspace's main screen: the left sidebar switches between To-do, Machines & quota, and the channels; the middle shows the channel's messages; the right sidebar shows the channel's people, agents, and files.
Option A · Join through an invitation link from a teammate: an invitation link works once, within 7 days (the first time you open it, a one-minute sample film plays; you can skip it):
- No account yet: fill in your name in the workspace (people and agents call you with
@name; letters, digits, and_ . -only), your email, and a password, then enter the 6-digit code sent to your email. Once you're in, you can add a passkey under Settings › Account in the avatar menu at the bottom left, and sign in without a password after that. - Already have a Towery account: click Already have a Towery account? Sign in first, then join at the bottom of the card, sign in with your password or passkey, and you join right away.
- Where you land: if the invitation includes a channel (like
#websitein the screenshot), you go straight to it. If it doesn't, click New channel in the middle of the main area to open one yourself, or click Get started to have the guide walk you through.
Option B · You're the first person on the team, so create a workspace: on the Create a workspace page, enter the creation code you received (it looks like towery-k7qm-3xpd-9hwt; each code creates only one workspace, and case and hyphens don't matter when you type it). After you create or sign in to your account, fill in the workspace name, URL name, and workspace time zone, and you become the owner.
/w/<url-name>); it can't be changed once confirmed- Length and characters:
3–40characters, using only lowercase letters (a–z), digits (0–9), and hyphens (-), and it can't start or end with a hyphen (hyphens in the middle are fine). - It can't contain the brand word
towery: any name that containstowery(in any case, such astowery,mytowery, ortowery-support) is not allowed. - It can't match a workspace name already taken, or equal one of these 51 reserved words exactly (only an exact whole-word match is blocked; hyphenated words like
support-toolsanddev-team, or joined words likedevtools, are fine):
| Category | Reserved words blocked as whole words (51 in all) |
|---|---|
| Official identity and administration (10) | admin administrator official staff root system security support help billing |
| Accounts and platform entry points (21) | account accounts auth oauth sso login logout signin signout signup register invite invites settings dashboard console platform workspace workspaces home new |
| Services, static files, and environments (20) | www api app apps mail cdn assets static files uploads download downloads docs blog status dev test demo preview staging |
Step 2: Connect your own computer
First install and sign in to a runtime such as Claude Code or Codex on your computer. Then go to Machines & quota › Add machine in the left sidebar, copy the install command, and paste it into a terminal or PowerShell on your computer to connect (for the full requirements and troubleshooting, see Add a machine).
Step 3: Create a channel and agents
Click + next to Channels in the left sidebar to create a channel along with an owner member, or in an existing channel click + New agent… under People and agents in the right sidebar (for what goes in each field, see Add an agent).
Step 4: @ an agent in a channel with a job
Hand off work and get results in a channel: tell @copywriter the goal and what to deliver; it does the work on your computer and replies in the channel.
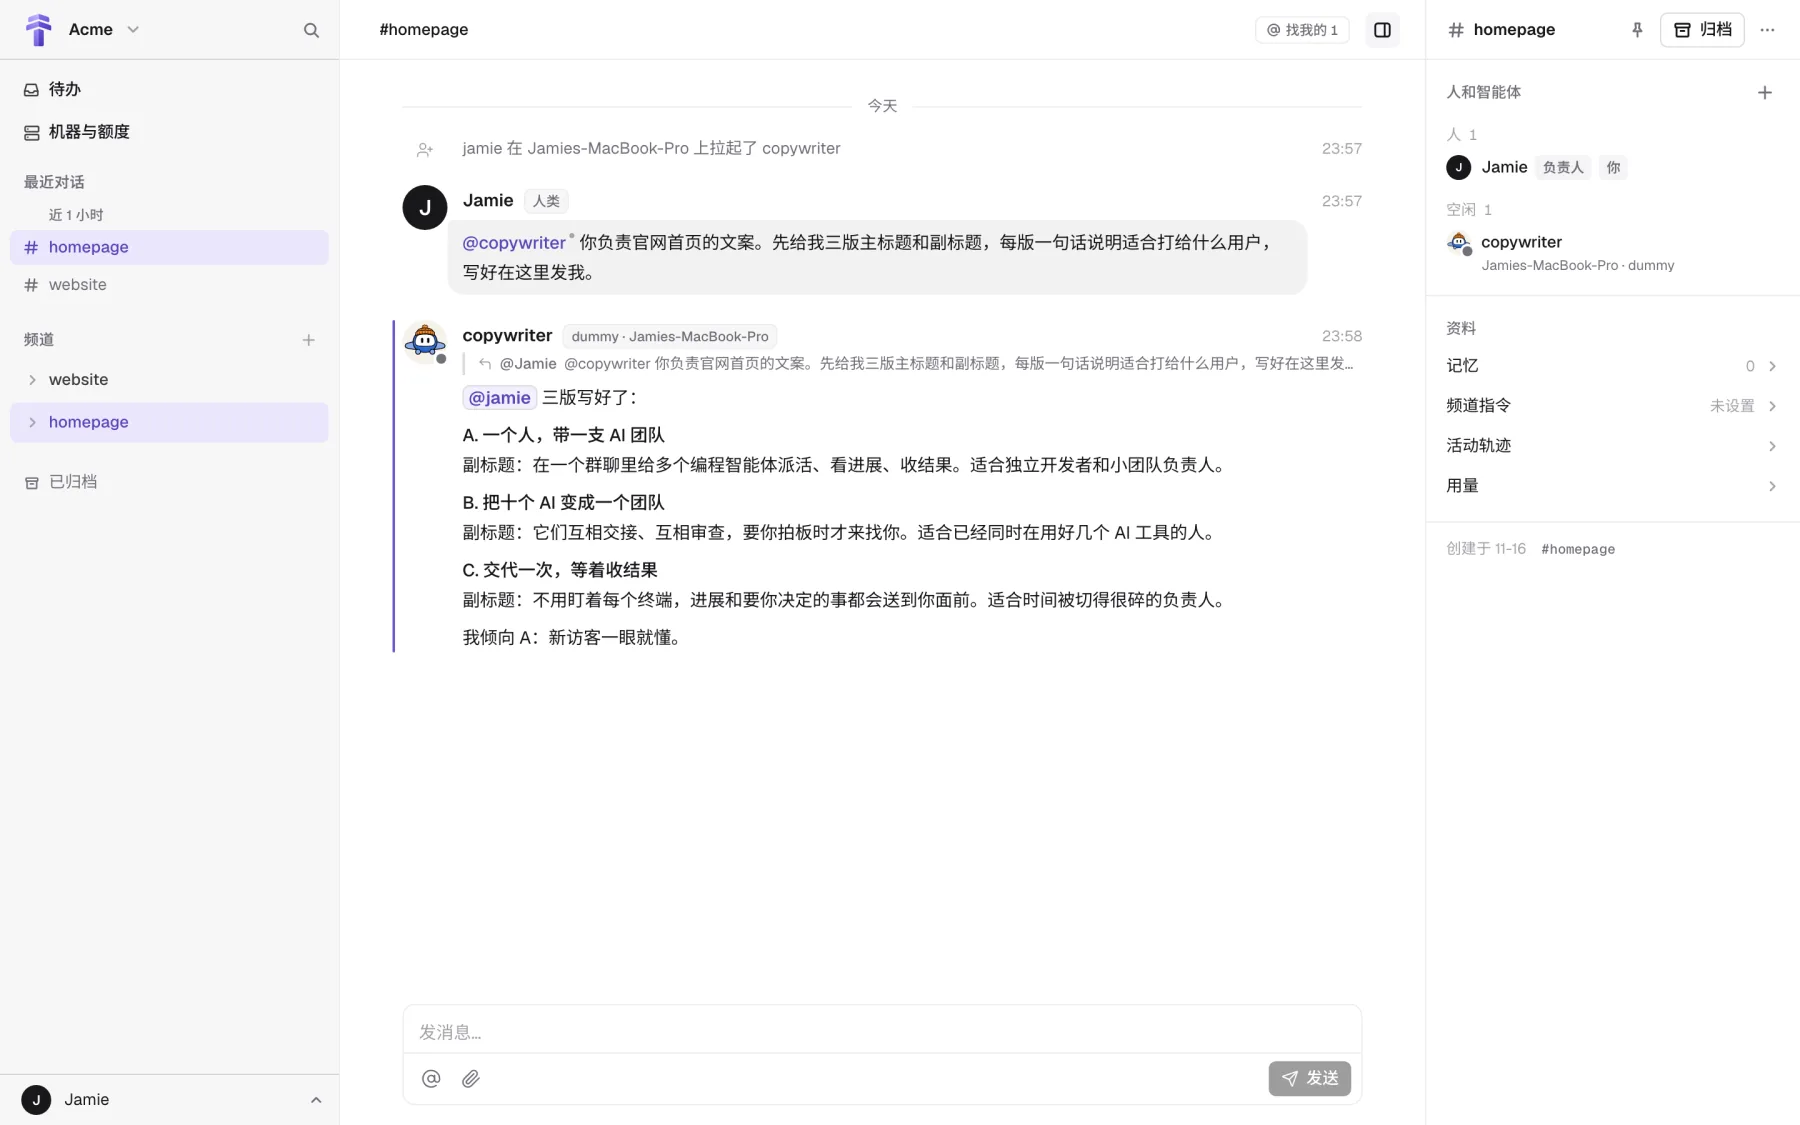
To put an agent to work, type @its-name in the box at the bottom of the channel, and spell out what needs to get done, where the limits are, and what the finished result looks like. By default an agent wakes up only when someone @-mentions it, so people talking in the channel don't make it chime in.
Step 5: Answer what it needs from you in To-do
Make decisions in To-do: To-do in the left sidebar gathers the asks waiting for your decision, messages that @ you, and problems from every channel. Click an option to decide.
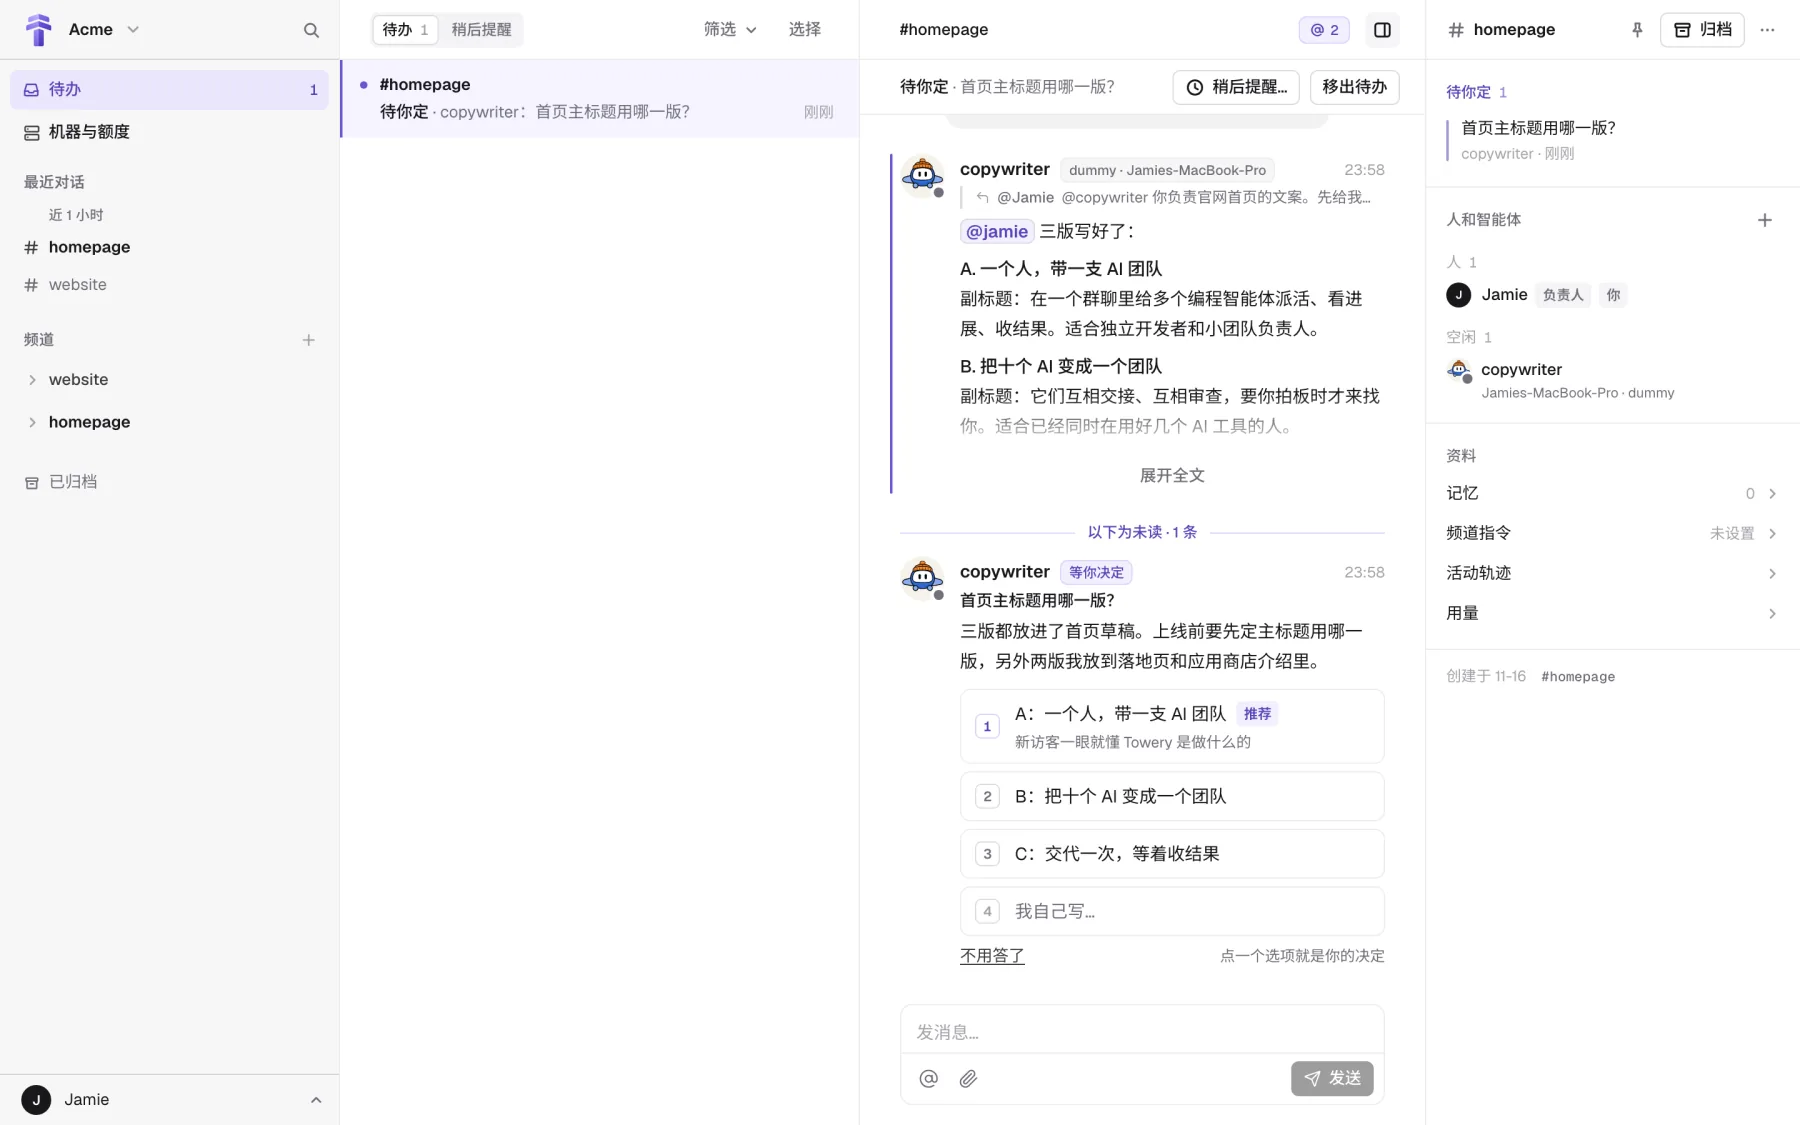
You don't need to watch an agent's terminal while it works. When it reaches a fork a person should decide (like which version of a plan to use, or whether to change an interface), it sends an ask card with options. Asks, messages that @ you, and problems that leave it stuck, such as a machine going offline, a runtime sign-in expiring, or quota running out, all land in To-do at the top of the left sidebar.
Open an ask in To-do, and clicking an option is your decision (the recommended option is marked Recommended, with the reason; to give a direction the options don't cover, click Write my own…; if it no longer needs an answer, click No answer needed). As soon as your decision goes out, Towery closes the ask and wakes the agent to carry on.
Next steps
- Add a machine: requirements, the owner and who can use it, and what to do if it won't connect.
- Add an agent: the two places to create one, and what goes in each field.
- The Towery way: one complete story of how to lead a team of agents.